Search This Blog

Friday, 13 January 2012

Peachtree- Purchase / Receive Inventory


Purchase / Receive Inventory
Purchase receive inventory is used to receive the inventory from the vendors either against the purchase order or without the purchase order.
Following are the steps to record the purchase / receive inventory from vendor.
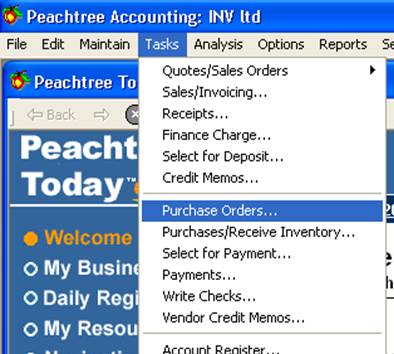
Step no 1. First of all go to task menu bar and click on “purchase / receive inventory”.

The following window will appear.

Step no 2. First thing is to enter the “Vendor ID” in vendor ID field. It is the ID of the vendor to whom from purchases have been made. When you select the vendor remit to field will show the detail of the vendor.

Step no 3. When user selects the vendor “Ship to” field will be filled with the address of vendor where from shipment received.

Step no 4. Enter the date of receiving the item in “Date” field.

Step no 5. Enter the invoice number in “Invoice no” field. This field is used to give a unique or different code to each invoice for identification and avoid repetition in issuance to the vendors.

Step no 6. Enter the customer invoice number in “Customer invoice no” field. It is the number of invoice sent by the customer against which the purchase is being made.

Step no 7. The “Term” field will be filled automatically when you select the vendor. These terms are payment terms and created when vendor account are created in maintain menu.

Step no 8. Select the method of delivery that how the goods will be delivered in “Ship via” field.

Step no 10. Enter the account payable ID or select it from the list of chart of accounts in the “A/P Account”. This is the account to which the amount due of the purchases will be charged.

When you will enter the Vendor’s ID, if there is any purchase order issued to that vendor than the below given tab “Apply to purchase order no” will also be enabled. Otherwise only the tab “Apply to purchases” will be enabled.

If you are receiving inventory against the purchase order issued to the vendor than the following steps will be followed.

Step no 11. Select the purchase order number from drop down list on the Apply to purchase order tab against the goods which are being purchased as shown in given below pictures.

Step no 12. When you select the purchase order number the remaining fields will be automatically filled.

Step no 13. Enter the quantity of items for purchase order in “Item” field.

Step no 14. Description of item will automatically fill as default in “Description” field.

Step no 15. Enter the “GL Account” which you want to use for this purchase. As default, the inventory account is selected in this tab.

Step no 16. Enter the per unit price of the item in “Unit price” field.

Step no 17. “Amount field” will automatically fill as you select the unit price.

Step no 24. Click on the “Save” button to save the transaction

Peachtree- Purchase Order


Purchase Order
Purchase order is the written document send by the buyer to the seller contains the details about the required goods or services. I.e. Quantity, price etc
In order to create a purchase order the user has to follow the following process.
Step no 1. Go to the task menu and click on “Purchase order”.

As you select the “Purchase Order” the following screen will appear.


Step no 2: The first thing which user have to do in order to creation of purchase order is to enter the “Vendor ID” of that vendor for whom this purchase order he is creating.
In case there is no vendor user can create it while cursor is blinking in customer ID field user have to simply press the “+” key or “Double click” or click on magnifier glass and click on “New” button. Maintaining customer screen will appear in which user can create a new vendor.

Step no 3: When user create and select the vendor “Ship to” field will be filled with the address of vendor where the shipment will be send.

Step no 4: Enter the date on which the purchase order are issued in “Date” field.

Step no 5: Enter the date on which this purchase order will be dispatched or send from the company in “Good thru” field.

Step no 6: Enter the reference number in “Po no” field. This field is used to give a unique or different code to each purchase order for identification and avoid repetition in issuance to the vendors.

Step no 7: Select the method of delivery that how the goods will be delivered in “Ship via” field.

Step no 8: The “Term” field will be filled automatically when you select the vendor. These terms are payment terms and created when vendor account are created in maintain menu.

Step no 9: Enter the account payable account ID in the “A/P account” field. This is the account to which the amount of the purchase order will be charged when the goods are received.

Step no 10: Enter the quantity of items for purchase order in “Quantity” field.
Step no 11: Now select the item ID in the “Item ID” field. Items can be created in the maintain inventory item.

Step no 12: Description of item will automatically fill as default in “Description” field.

Step no 13: Enter the per unit price of the item in “Unit price” field.

Step no 14: Enter the GL account in the “GL account” field.

Step no 15: The “amount field” will be filled with the multiplication of the unit price with the quantity.

Step no 16: Click on the “Save” button to save the purchase order.

Friday, 6 January 2012

Peachtree- Receipts


Receipts
Receipts are used to receive cash from the customer or vendor against or without the invoice. In order to make receipts user must followed the following steps
Step no 1. First of all go to task bar menu and click on “Receipts”.

The following window will appear.

Step no 2. Select the customer or vendor from the drop down list and enter the “ID” of the customer or vendor, from payment have to receive.
Step no 3. When user selects the customer or vendor “Name” field will be filled with the name of the customer.
Step no 4. Enter the “Bank deposit slip no” in the deposit ticket ID field.
Step no 5. Enter the reference number in “Reference no” field. This field is used to give a unique or different code to each receipt for identification and avoid repetition.
Step no 6. Enter the receipt number in the “Receipt no” field.
Step no 7. Select the payment method in “Payment method” field.
Step no 8. Select the cash account from the “Cash account” drop down menu.
Step no 9. Cash account balance is used to check the balance of cash by clicking on the “$” button.
Step no 10. In case there is any invoice due for receipts of customer or vendor, when we enter the ID of that customer or vendor the “Apply to invoices” tab will be enabled.

Step no 11. The first field is “Invoice” field. Invoice shows a number which is issued while issuing a sale invoice to the concerned customer.
Step no 12. The “Date due” and “Amount due” field will be filled automatically with invoice the date due field show for your invoice and the amount due shows the unpaid amount.
Step no 13. Enter the description in “Description field”.
Step no 14. The “Discount” field will calculate the discount automatically according to terms selected for the customers whose ID is entered.
Step no 15. Enter the amount which has to receive from the customers in “Amount paid” field.  
Step no 16. User can also check the box of “Pay” if amount is received.
Step no 17. Click on “Save” button to save the receipt.


Wednesday, 28 December 2011

Peach-tree. Sales Invoicing


SALES / INVOICING
            Sales invoices are used to enter the inventory items or finished goods which are being sold to the customer. Following are the steps to guide that how to create sales invoice
Step no 1. First of all go to task menu bar and click on “Sales invoicing”.

The following window will appear.

Step no 2. First thing is to enter the “customer ID” in customer ID field. It is the ID of the customer to whom the sales have been made. When you select the customer the bill to field will show the detail of the customer.

Step no 3. When user selects the customer “Ship to” field will be filled with the address of customer where the shipment was sent.

Step no 4. Enter the date on which the sales invoice is issued in “Date” field.
Step no 5. Enter the invoice number in “Invoice no” field. This field is used to give a unique or different code to each invoice for identification and avoid repetition in issuance to the customers.

Step no 6. Customer purchase order number is entered in the “Customer Po” field.

Step no 7. Select the method of delivery that how the goods will be delivered in “Ship via” field.

Step no 8. Enter the date when the goods are shipped or expecting to be shipped in the “Ship date” field.

Step no 9. The “Term” field will be filled automatically when you select the customer. These terms are payment terms and created when customer account are created in maintain menu.

Step no 10. The sales representative ID can also be entered in “Sales Rep” field.

When you will enter the customer’s ID, if there is any sales order issued to that customer than the below given tab “Apply to sales order” will also be enabled. Otherwise only the tab “Apply to sales” will be enabled.

If you are making an invoice against the sales order issued to the customer than the following steps will be followed.

Step no 11. Select the sales order number from drop down list on the Apply to sales order tab against the goods which are being sold as shown in given below pictures.


Step no 12. When you select the sale order number the remaining fields will be automatically filled.

Step no 13. Enter the quantity of items for sales order in “Quantity” field.

Step no 14. Description of item will automatically fill as default in “Description” field.

Step no 15. Enter the per unit price of the item in “Unit price” field.
Step no 16. “Amount field” will automatically fill as you select the unit price.
Step no 17. User can also enter the freight amount in “Freight” field.

Step no 18. Click the “Save” button to save the transaction
When the goods are sold to the customers without issuing any Sale Order than select the “apply to sales” Tab.

Step no 19. Enter the number of items being sold in the “Quantity” field.
Step no 20. Enter the item ID in “Item” field of good which you are selling, the description tab will be filled automatically.
Step no 21. Enter the per unit price of the item in “Unit price” field.
Step no 22. “Amount field” will automatically fill as you select the unit price.
Step no 23. User can also enter the freight amount in “Freight” field.
Step no 24. Click on the “Save” button to save the transaction

When you click on the save button if a warning message is shown by the system its states that your customer credit limit is less and your transaction include more amount as compare to his credit limit. As you click on “Ok” the transaction will be saved.


Friday, 23 December 2011

Peachtree. Quotes and Sales Order


QUOTES

           “Quotes” is the quotation which is issued by seller to the buyer on buyer demand. It’s like an offer which seller gives to buyer. It consists of details of per unit price, description of the good and the quantity of the good.

Now here is the procedure that how user can create or issued “Sales quotes”.

Step no 1: Go to the task menu and click on “Quotes/ Sales order” sub menu will appear select the “Quotes”.


As you select the quotes the following screen will appear.


Step no 2: The first thing which user have to do in order to creation of quotation is to enter the “Customer ID” of that customer for whom this quotation he is creating.
In case there is no customer user can create it while cursor is blinking in customer ID field user have to simply press the “+” key or “Double click” or click on magnifier glass and click on “New” button. Maintaining customer screen will appear in which user can create a new customer.

Step no 3: When user create and select the customer “Ship to” field will be filled with the address of customer where the shipment will be send.

Step no 4: Enter the date on which the quotation are issued in “Date” field.

Step no 5: Enter the date on which this quotation will expire in “Good thru” field.

Step no 6: Enter the reference number in “Quote no” field. This field is used to give a unique or different code to each quotation for identification and avoid repetition in issuance to the customers.

Step no 7: Customer purchase order number can also be entered in “Customer PO” field.

Step no 8: Select the method of delivery that how the goods will be delivered in “Ship via” field.

Step no 9: The “Term” field will be filled automatically when you select the customer. These terms are payment terms and created when customer account are created in maintain menu.

Step no 10: The sales representative ID can also be entered in “Sales Rep” field.

Step no 11: Enter the quantity of items for quotation in “Quantity” field.

Step no 12: Now select the item ID in the “Item ID” field. Items can be created in the maintain inventory item.

Step no 13: Description of item will automatically fill as default in “Description” field.

Step no 14: Enter the per unit price of the item in “Unit price” field.

Step no 15: User can also enter the freight amount in “Freight” field.

Step no 16: Click on the “Save” button to save the quotes.


SALES ORDER

A seller-generated document that authorizes sale of the specified item(s), issued after receipt of a customer's purchase order. A sales order usually implies that there will be no additional labor or material cost incurred for the sale, except where it is used to initiate a production process.

Now here is the procedure that how user can create or issue a sales order. User can issue a new order or can also convert the quote into sales order.


CONVERT QUOTES INTO SALES ORDER:

In order to convert the quotes into sales order the following steps must be followed:

Step no 1: Go to the task menu and click on “Quotes/ Sales order” sub menu will appear select the “Quotes”.

Step no 2: Click on the “Open” button. A window will appear select the quote you want to convert and click on the “Ok” button.


Step no 3: The selected quote will open now click on “Convert” button and following screen will appear.


Step no 4: Select the “Sales order” button in order to convert the selected quote into sale order.

Step no 5: Click on the “Ok” to save the sales order.

NEW SALES ORDER:

In order to issue a new sales order the following steps must be followed:

Step no 1: Go to the task menu and click on “Quotes/ Sales order” sub menu will appear select the “Sales Order”.


As you select the “Sales Order” the following screen will appear.


Step no 2: The first thing which user have to do in order to creation of sales order is to enter the “Customer ID” of that customer for whom this sales order he is creating.
In case there is no customer user can create it while cursor is blinking in customer ID field user have to simply press the “+” key or “Double click” or click on magnifier glass and click on “New” button. Maintaining customer screen will appear in which user can create a new customer.
Step no 3: When user create and select the customer “Ship to” field will be filled with the address of customer where the shipment will be send.

Step no 4: Enter the date on which the sales order are issued in “Date” field.

Step no 5: Enter the date on which this sales order will be dispatched or send from the company in “Ship By” field.

Step no 6: Enter the reference number in “So no” field. This field is used to give a unique or different code to each sales order for identification and avoid repetition in issuance to the customers.

Step no 7: Select the method of delivery that how the goods will be delivered in “Ship via” field.

Step no 8: The “Term” field will be filled automatically when you select the customer. These terms are payment terms and created when customer account are created in maintain menu.

Step no 9: The sales representative ID can also be entered in “Sales Rep” field.

Step no 10: Enter the quantity of items for sales order in “Quantity” field.

Step no 11: Now select the item ID in the “Item ID” field. Items can be created in the maintain inventory item.

Step no 12: Description of item will automatically fill as default in “Description” field.

Step no 13: Enter the per unit price of the item in “Unit price” field.

Step no 14: User can also enter the freight amount in “Freight” field.

Step no 16: Click on the “Save” button to save the sales order.

Saturday, 17 December 2011

Peachtree. Maintain inventory items


MAINTAIN INVENTORY ITEMS
As we started business for making transactions before we make transactions we have to set up our inventory. In order to setting up an inventory we will follow the following procedure
.
Step No 1. First we will go to maintain menu and select the ‘Inventory item’ from maintain menu.

Step No 2.  As you click on inventory item the following screen will appear with five different tabs. In this window user can maintain inventory items. The following process will help him out.
Ø  Give Item ID
Ø  Give the Description
Ø  Provide general ledger sales account
Ø   Provide the inventory account
Ø  Provide the cost of sales account
Ø  Click on save button
The field tab will be changed according to the selected item class.

After entering the necessary account the user will click on “Save” button. As you successfully created the inventory items now you click on “Beginning balance” for enter the beginning balances. As you click on it the following screen will appear.


As you enter item id you’ll be able to enter quantity, unit cost and total cost. After entering all the balances for saving them you have to click on “Ok” for save them.


Item Class:
                        On the right side of the window there is item class tab, and in that tab user can select eight different types of items.


Maintaining Assembly Item:
                                              This class is used for items which are consisting on different components that must be built. Such as for assembling a computer we need Ram, Hard disk, Casing, Mother board, Power supply, CD Rom, etc. CPU will be considered as   assembly item and the components of it will be saved as the stock item.

For maintaining the assembly the process is given below.
                                           
In order to maintain assembly item first give item ID and then description after that select the item class as assembly in maintain inventory item than the bill of material tab field will appear you just enter account IDs and after savin it you will be enable to enter the beginning balnces in it.


After entering the item ID and description, enter the GL sales account, GL inventory account and GL cost of sales account and the unit measure in general field tab.  After that you have to enter in bills of material tab that for an assembling an item which components are required in how many quantity and the components are already available in stock item. After all that you just click on save or if you want to enter beginning balance of assembly item click on “Beginning balance” the bill of material tab will appear in which you can enter all the balances.


At the end just click on save button and your data will be saved.